June
12th,
2018
 This is sort of a fan post, because when I saw Reynico’s present for his friend I thought “Man, that it is so cool”… And then I knew that I would have to make a different gift for my friend Diego.
Diego is a fan of Mr. Robot, and this is his birthday present.
TODO: add a demo gif/video
The hardware
You will need this stuff
- 1 Raspberry Pi ( I used a zero w)
- 1 micro SD card
- a normally open button to turn on and off the pi (see instructions here)
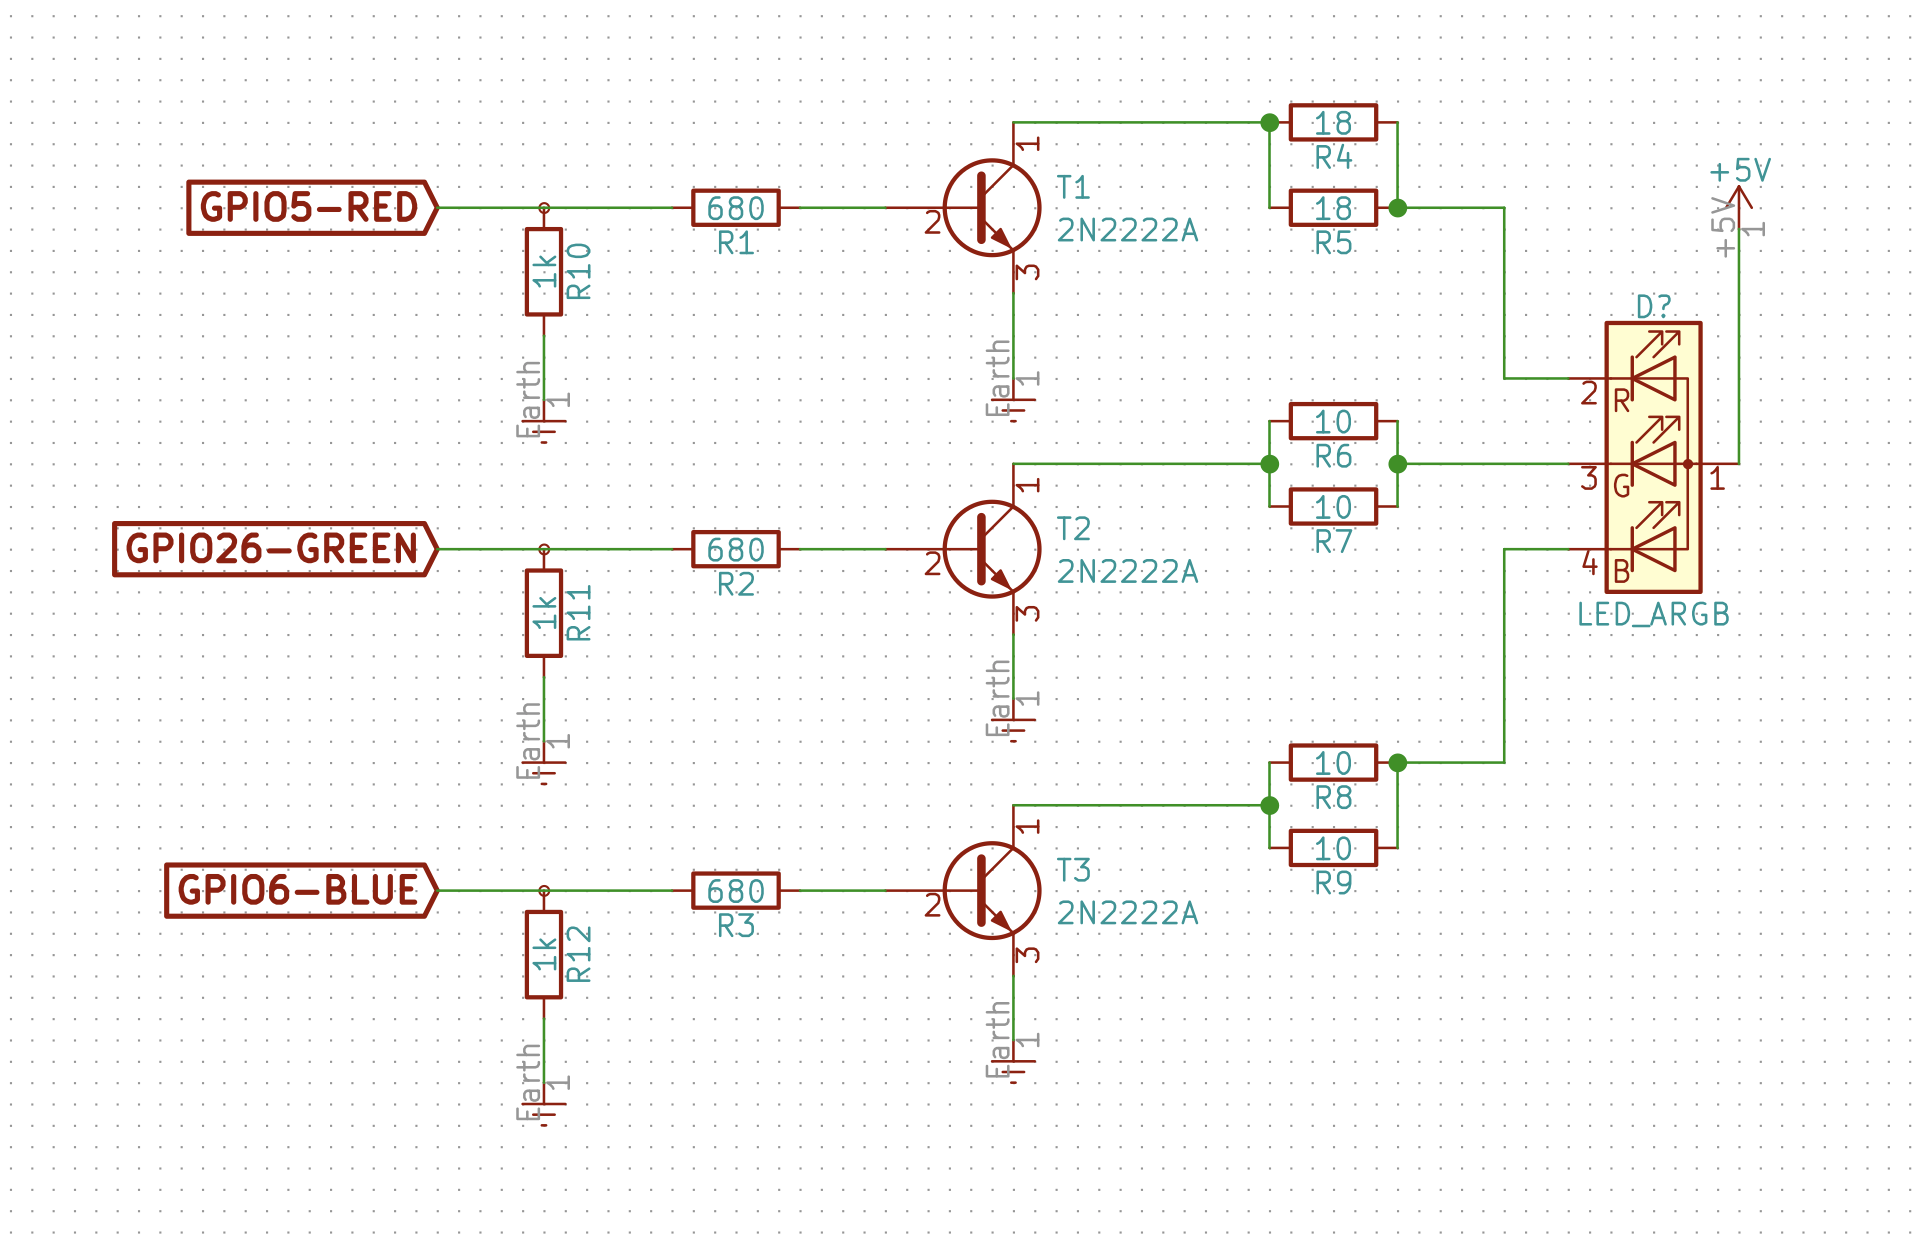
- power driver for the LED
- 1 x 1W RGB LED with pcb
- 3 x 1k Ohms 1/4W resistors
- 3 x 680 Ohms 1/4W resistors
- 2 x 18 Ohms 1/4W resistors
- 4 x 10 Ohms 1/4W resistors
- 3 x 2n2222A NPN transistors
- a prototyping pcb
- a frame
- a box
Putting all the pieces together
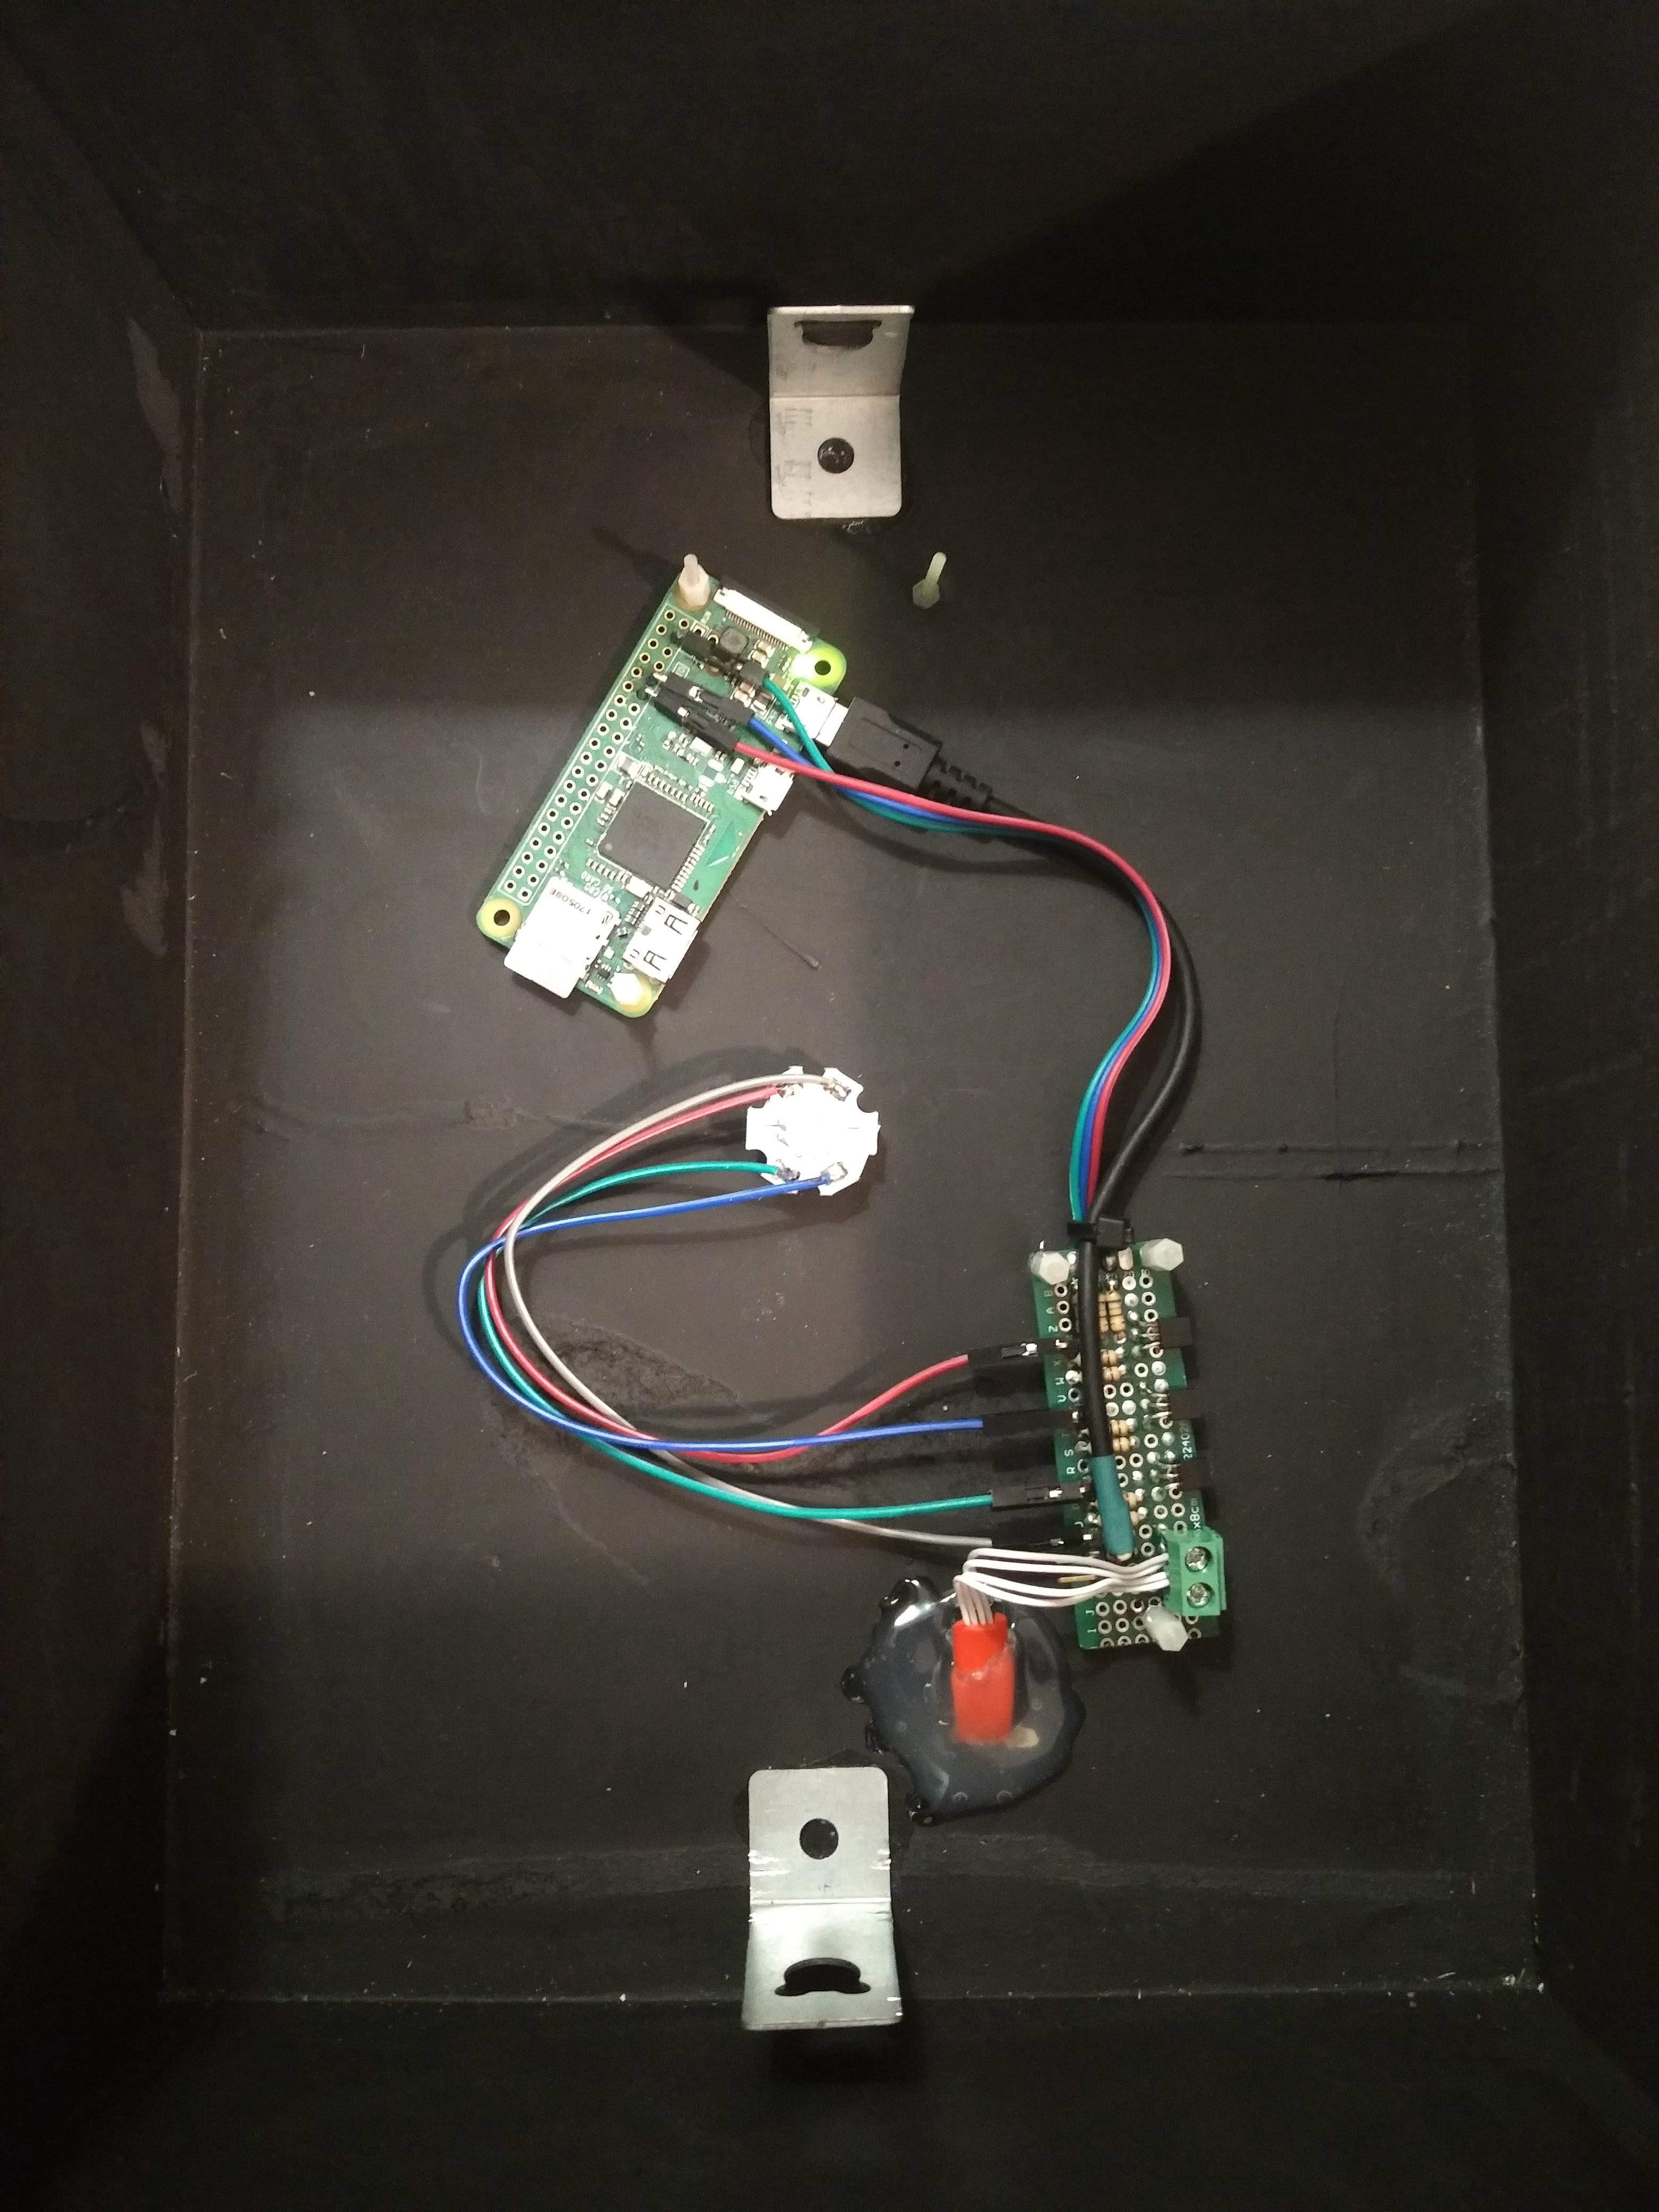
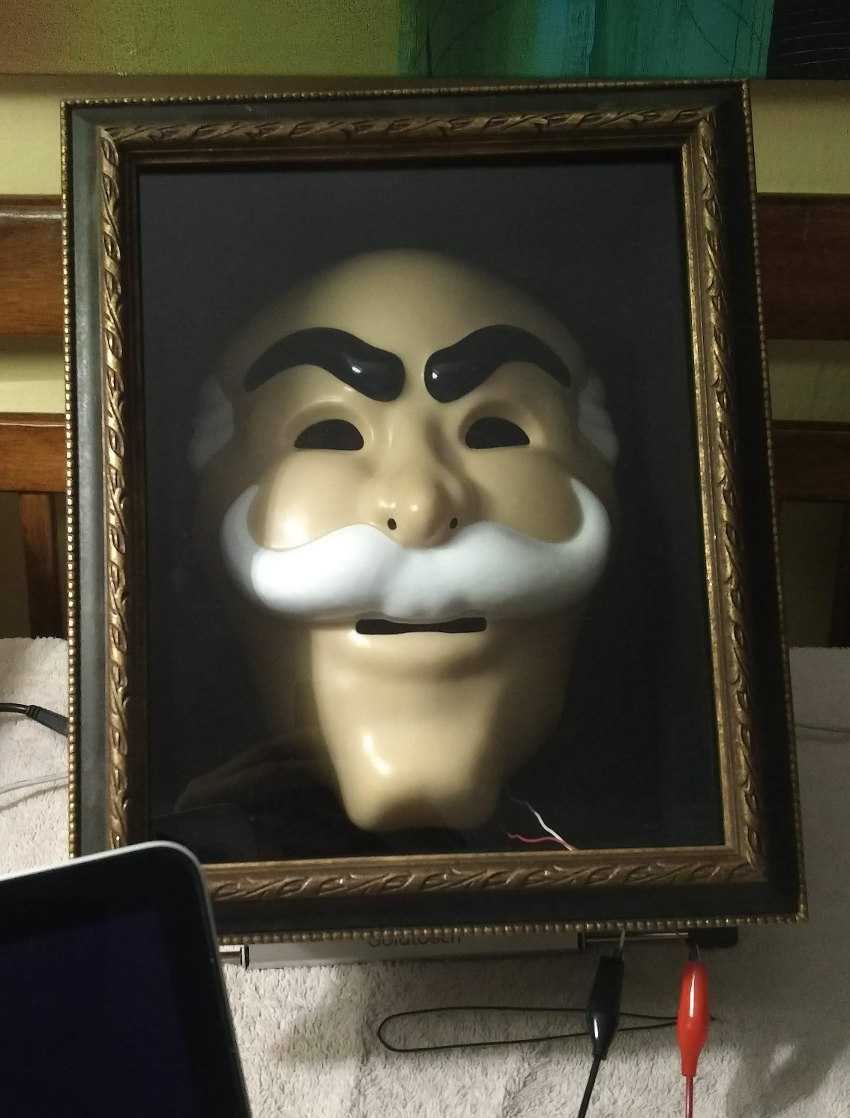
I built a simple box, got an old frame from a local store and mounted all the components. The frame is mounted on hinges and the mask with magnets so it is easy to reach to the electronics if needed. The interior of the box is painted with Black 2.0 to give the impression the mask is floating. Here you can see some pictures.

Mounting the components in the box

finished, the mask is mounted with magnets.

The software
- Install Raspbian Lite on the micro SD card. This is beyond the scope of this document, you can find a good guide here.
- Enable sshd (guide here).
- Update the os and rename the node
# update the os
pi@raspbian:~ $ sudo apt update && sudo apt -y full-upgrade && sudo rpi-update
# Rename the os
pi@raspbian:~ $ sudo sed -i 's/raspberrypi/mrrobot/' /etc/hosts /etc/hostname
# reboot to apply the changes
pi@mrrobot:~ $ sudo reboot- Install homebridge
# sudo apt install git make libavahi-compat-libdnssd-dev
pi@mrrobot:~ $ sudo apt install git make libavahi-compat-libdnssd-dev
pi@mrrobot:~ $ wget -q -O - https://nodejs.org/dist/v9.10.1/node-v9.10.1-linux-armv6l.tar.gz | tar -zxvf -
pi@mrrobot:~ $ sudo mv node-v9.10.1-linux-armv6l /opt/node
pi@mrrobot:~ $ sudo update-alternatives --install "/usr/bin/node" "node" "/opt/node/bin/node" 1
pi@mrrobot:~ $ sudo update-alternatives --install "/usr/bin/npm" "npm" "/opt/node/bin/npm" 1
pi@mrrobot:~ $ sudo npm install --unsafe-perm -g homebridge
pi@mrrobot:~ $ sudo ln -sf /opt/node/lib/node_modules/homebridge/bin/homebridge /usr/local/bin/homebridge

# Install some plugins
pi@mrrobot:~ $ sudo npm install -g homebridge-pi
pi@mrrobot:~ $ sudo pm install -g homebridge-better-http-rgb
pi@mrrobot:~ $ sudo npm install -g homebridge-script2

# create a user for the service
pi@mrrobot:~ $ sudo useradd -M --system homebridge
pi@mrrobot:~ $ sudo adduser homebridge gpio
pi@mrrobot:~ $ sudo mkdir -p /var/lib/homebridge
pi@mrrobot:~ $ sudo chown homebridge:homebridge /var/lib/homebridge

# If you dont have one, create the config file.
pi@mrrobot:~ $ test -f /var/lib/homebridge/config.json || sudo wget -q -O /var/lib/homebridge/config.json https://raw.githubusercontent.com/nfarina/homebridge/master/config-sample.json

# install init script Running Homebridge on Bootup (systemd) https://gist.github.com/johannrichard/0ad0de1feb6adb9eb61a/
pi@mrrobot:~ $ sudo wget -O /etc/default/homebridge https://gist.githubusercontent.com/johannrichard/0ad0de1feb6adb9eb61a/raw/1cf926e63e553c7cbfacf9970042c5ac876fadfa/homebridge
pi@mrrobot:~ $ sudo wget -O /etc/systemd/system/homebridge.service https://gist.githubusercontent.com/johannrichard/0ad0de1feb6adb9eb61a/raw/1cf926e63e553c7cbfacf9970042c5ac876fadfa/homebridge.service

# start the service
pi@mrrobot:~ $ sudo systemctl daemon-reload
pi@mrrobot:~ $ sudo systemctl enable homebridge
pi@mrrobot:~ $ sudo systemctl start homebridge

# You can check the status of the service by calling
pi@mrrobot:~ $ systemctl status homebridge- install python3 and RPi.GPIO
pi@mrrobot:~ $ sudo apt install python3 python3-pip
pi@mrrobot:~ $ sudo pip3 install RPi.GPIO- TODO document how to customize config file, add scripts, hook to iphone