

What we know about these plugs
Brand: Amysen, Esicoo, etc. Seems to be another tuya space trooper.
Model number: YX-WS01
I love the quality of these plugs, they are well built and sturdy, unfortunately getting them to run a custom firmware is a pain, they really really want you to leave the original firmware. I will try to avoid these plugs and get something easier to flash in the future.
tuya-convert doesnt work anymore
I ordered these plugs because I saw that people where flashing them with tuya-convert, but didnt work…bummer, the factory firmware has been patched, so I had to find another way to flash it. Give it a try with the digiblurDIY guide, you might have one with the outdated firmware.
Update 20190310: a new digiblurDIY post address the same problem with other devices. Update 20200921: always up to date guide to flash esphome with tuya convert!
Hack it
I couldnt find a guide anywhere, so this might be the first one for this plug.
Jonathan from SuperHouseTV teaches how to flash anything with an esp8266, even if you dont know the pinout, so we just have to open it and solder 5 cables in the right places, easy right?
1 - Open it
I put it in a vise, compress it and used an exacto knife to help the plastic split. Release the vise, rotate the plug and repeat until the welded plastic starts to give. Then use a couple screw drivers to pry the lid off. If you are careful, you can get it oppened with minimal aestetic damage. DO NOT RUSH.
2 - Detach the board from the male plug
Once the lid poped out, you need to remove the male plug from the circuit board, this is hard because all that metal is disipating the heat, so it may take a while.
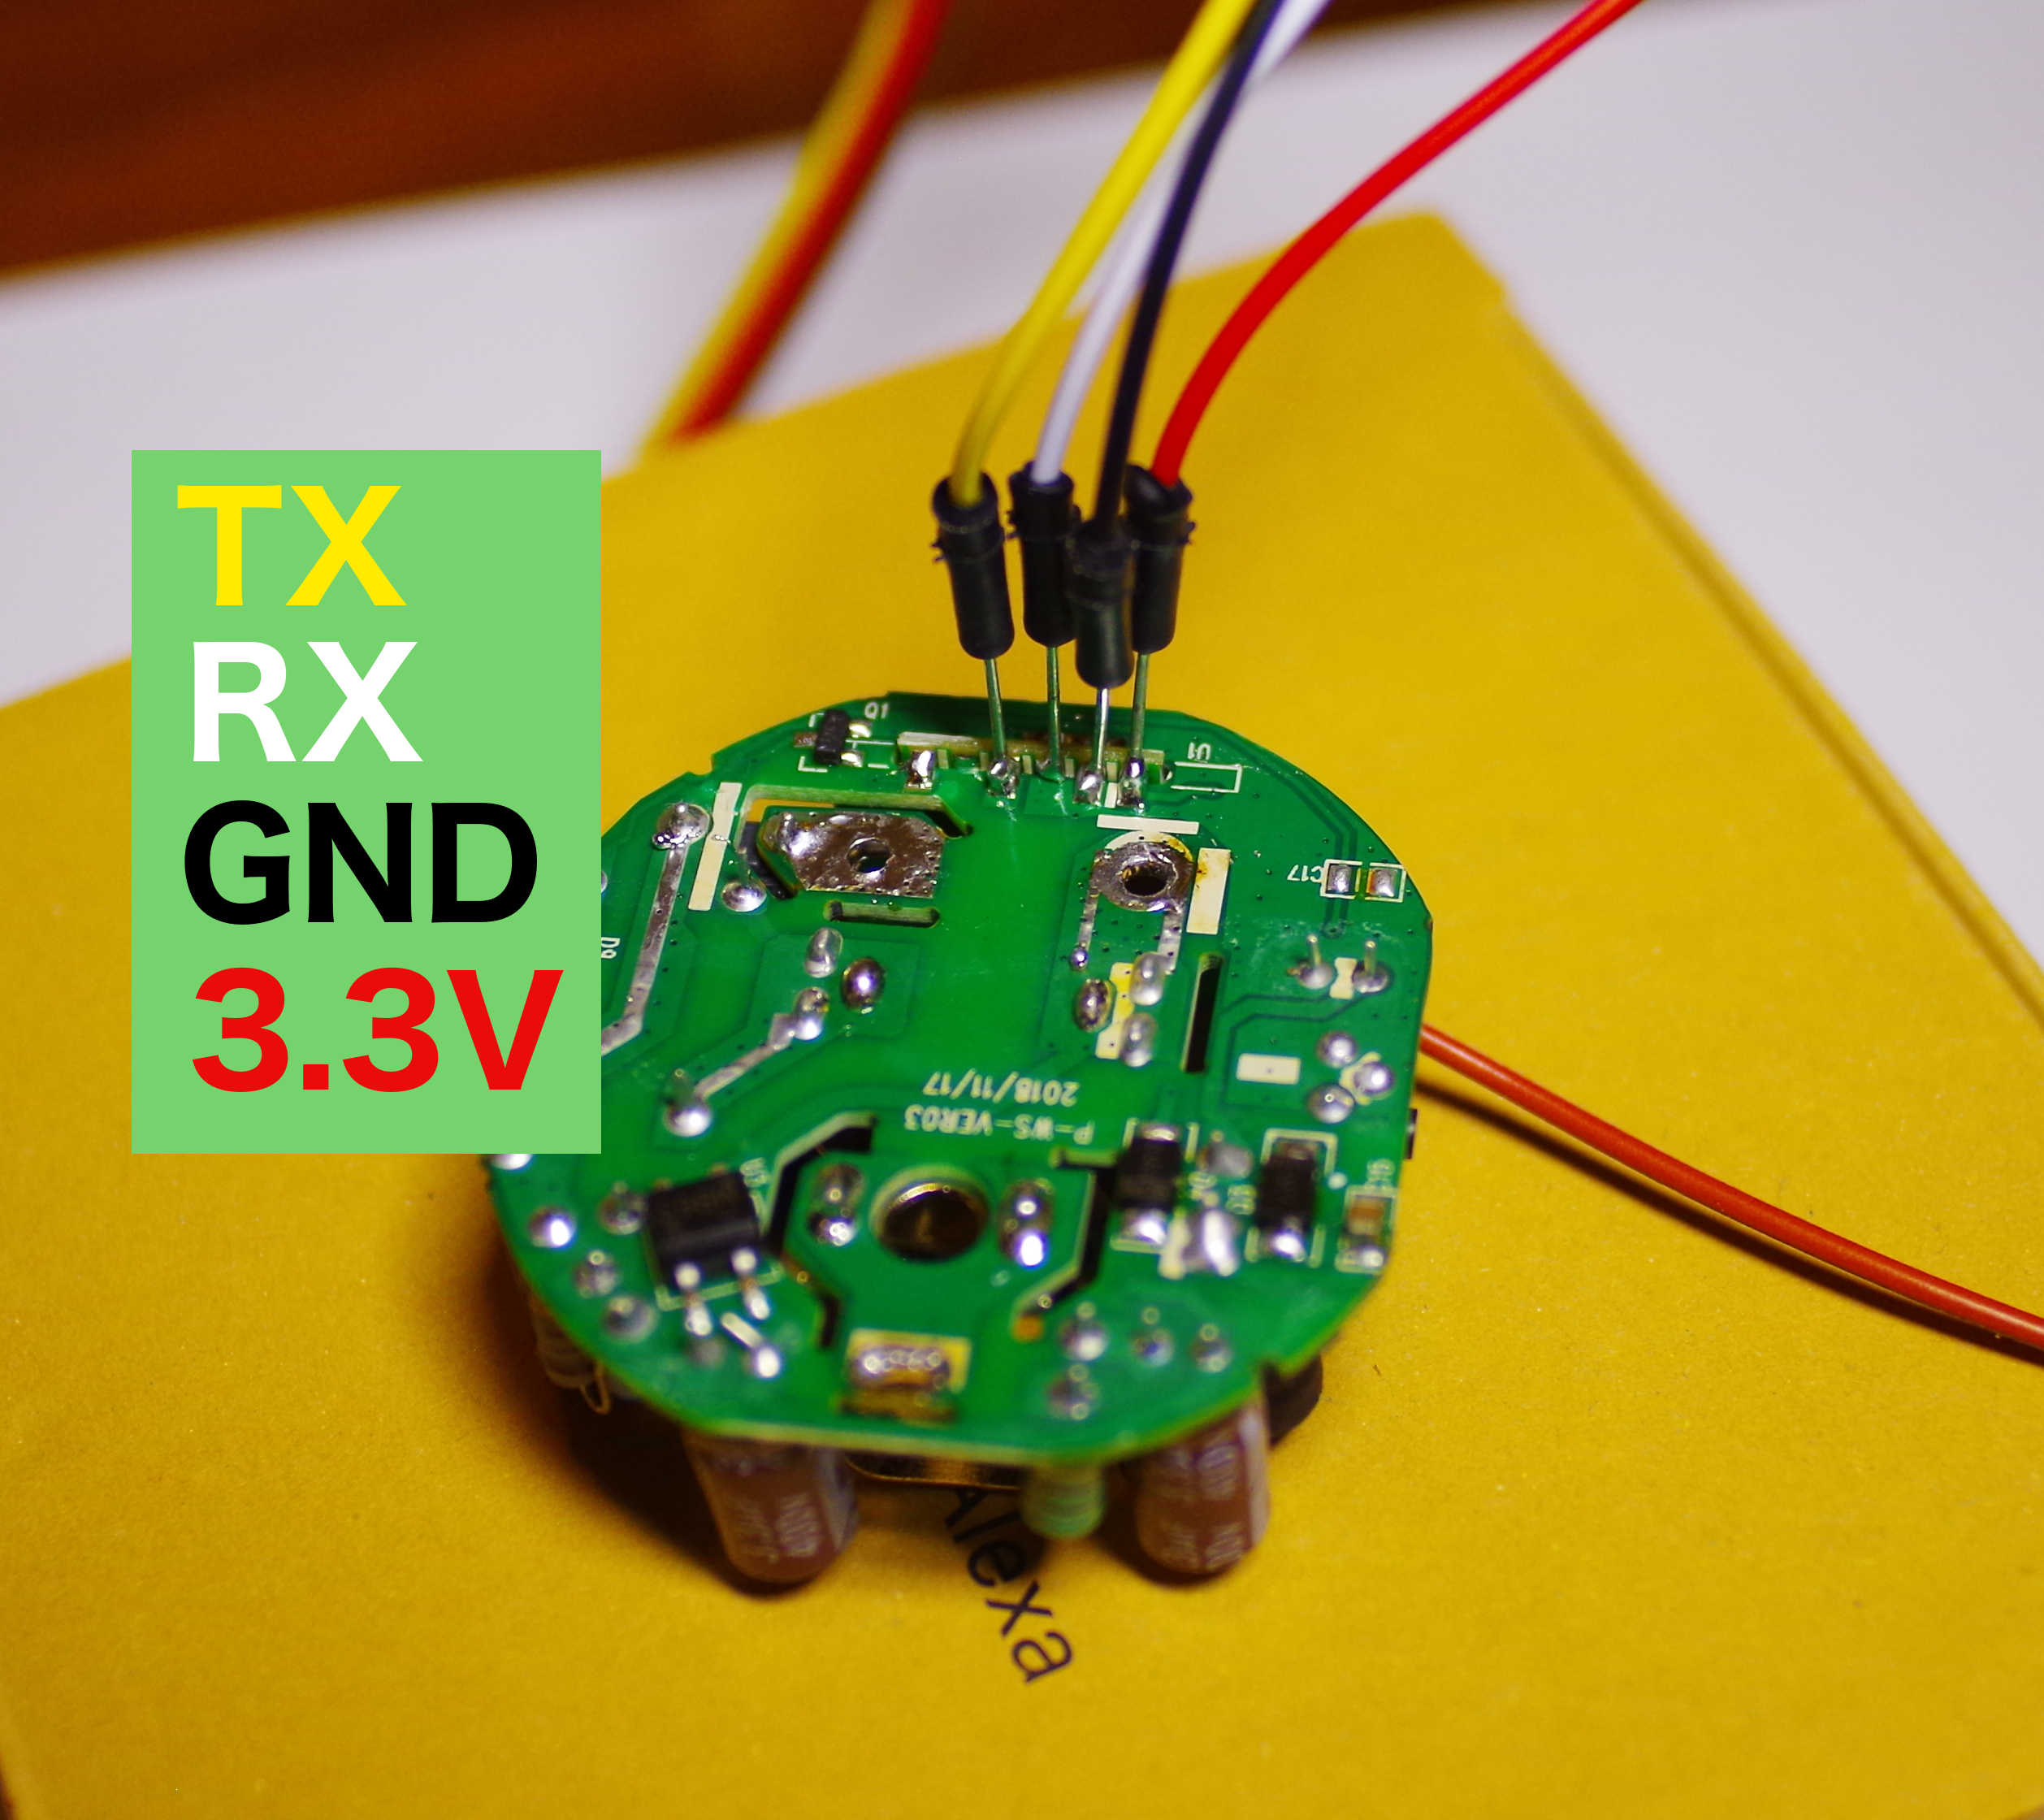
3 - Wire it like this
Prepare the custom firmware
You could download the tasmota image or make your own. I used ESPHome to create a custom firmware image. Took most of the configuration from here
Since I have several of these plugs, I used a template.
1 - create a template: .outlet-YX-WS01.yaml
esphome:
  name: $devicename
  platform: ESP8266
  board: $deviceboard

wifi:
  ssid: "YOUR WIFI SSID"
  password: "YOUR WIFI PASSWORD"
  domain: ".iot.loca"
  fast_connect: true

time:
  - platform: homeassistant
    id: homeassistant_time

# Enable logging
logger:

web_server:
  port: 80

# Enable Home Assistant API
api:
  password: "REPLACE ME"

ota:
  password: "REPLACE ME"

output:
  - platform: gpio
    id: led1
    pin:
      number: GPIO13
      inverted: true

light:
  - platform: binary
    name: Status LED
    id: status_led
    internal: true
    output: led1

switch:
  - platform: gpio
    name: ${friendly_name}
    id: relay
    pin:
      number: GPIO14
    on_turn_on:
      then:
        - light.turn_on: status_led
    on_turn_off:
      then:
        - light.turn_off: status_led

sensor:
  - platform: wifi_signal
    name: "${friendly_name} WiFi signal"
    update_interval: 60s
    accuracy_decimals: 0

  - platform: uptime
    name: "${friendly_name} uptime"
    accuracy_decimals: 0

binary_sensor:
  - platform: status
    name: ${friendly_name} Status
    id: ${devicename}_status

  - platform: gpio
    id: button
    internal: true
    pin:
      number: GPIO1
      mode: INPUT
    on_press:
      then:
        - switch.toggle: relay
2 - create one of this for each outlet
substitutions:
  devicename: socket_01
  friendly_name: Socket 01
  deviceboard: esp01_1m

<<: !include .outlet-YX-WS01.yaml
3 - compile and download the binary
Flash it
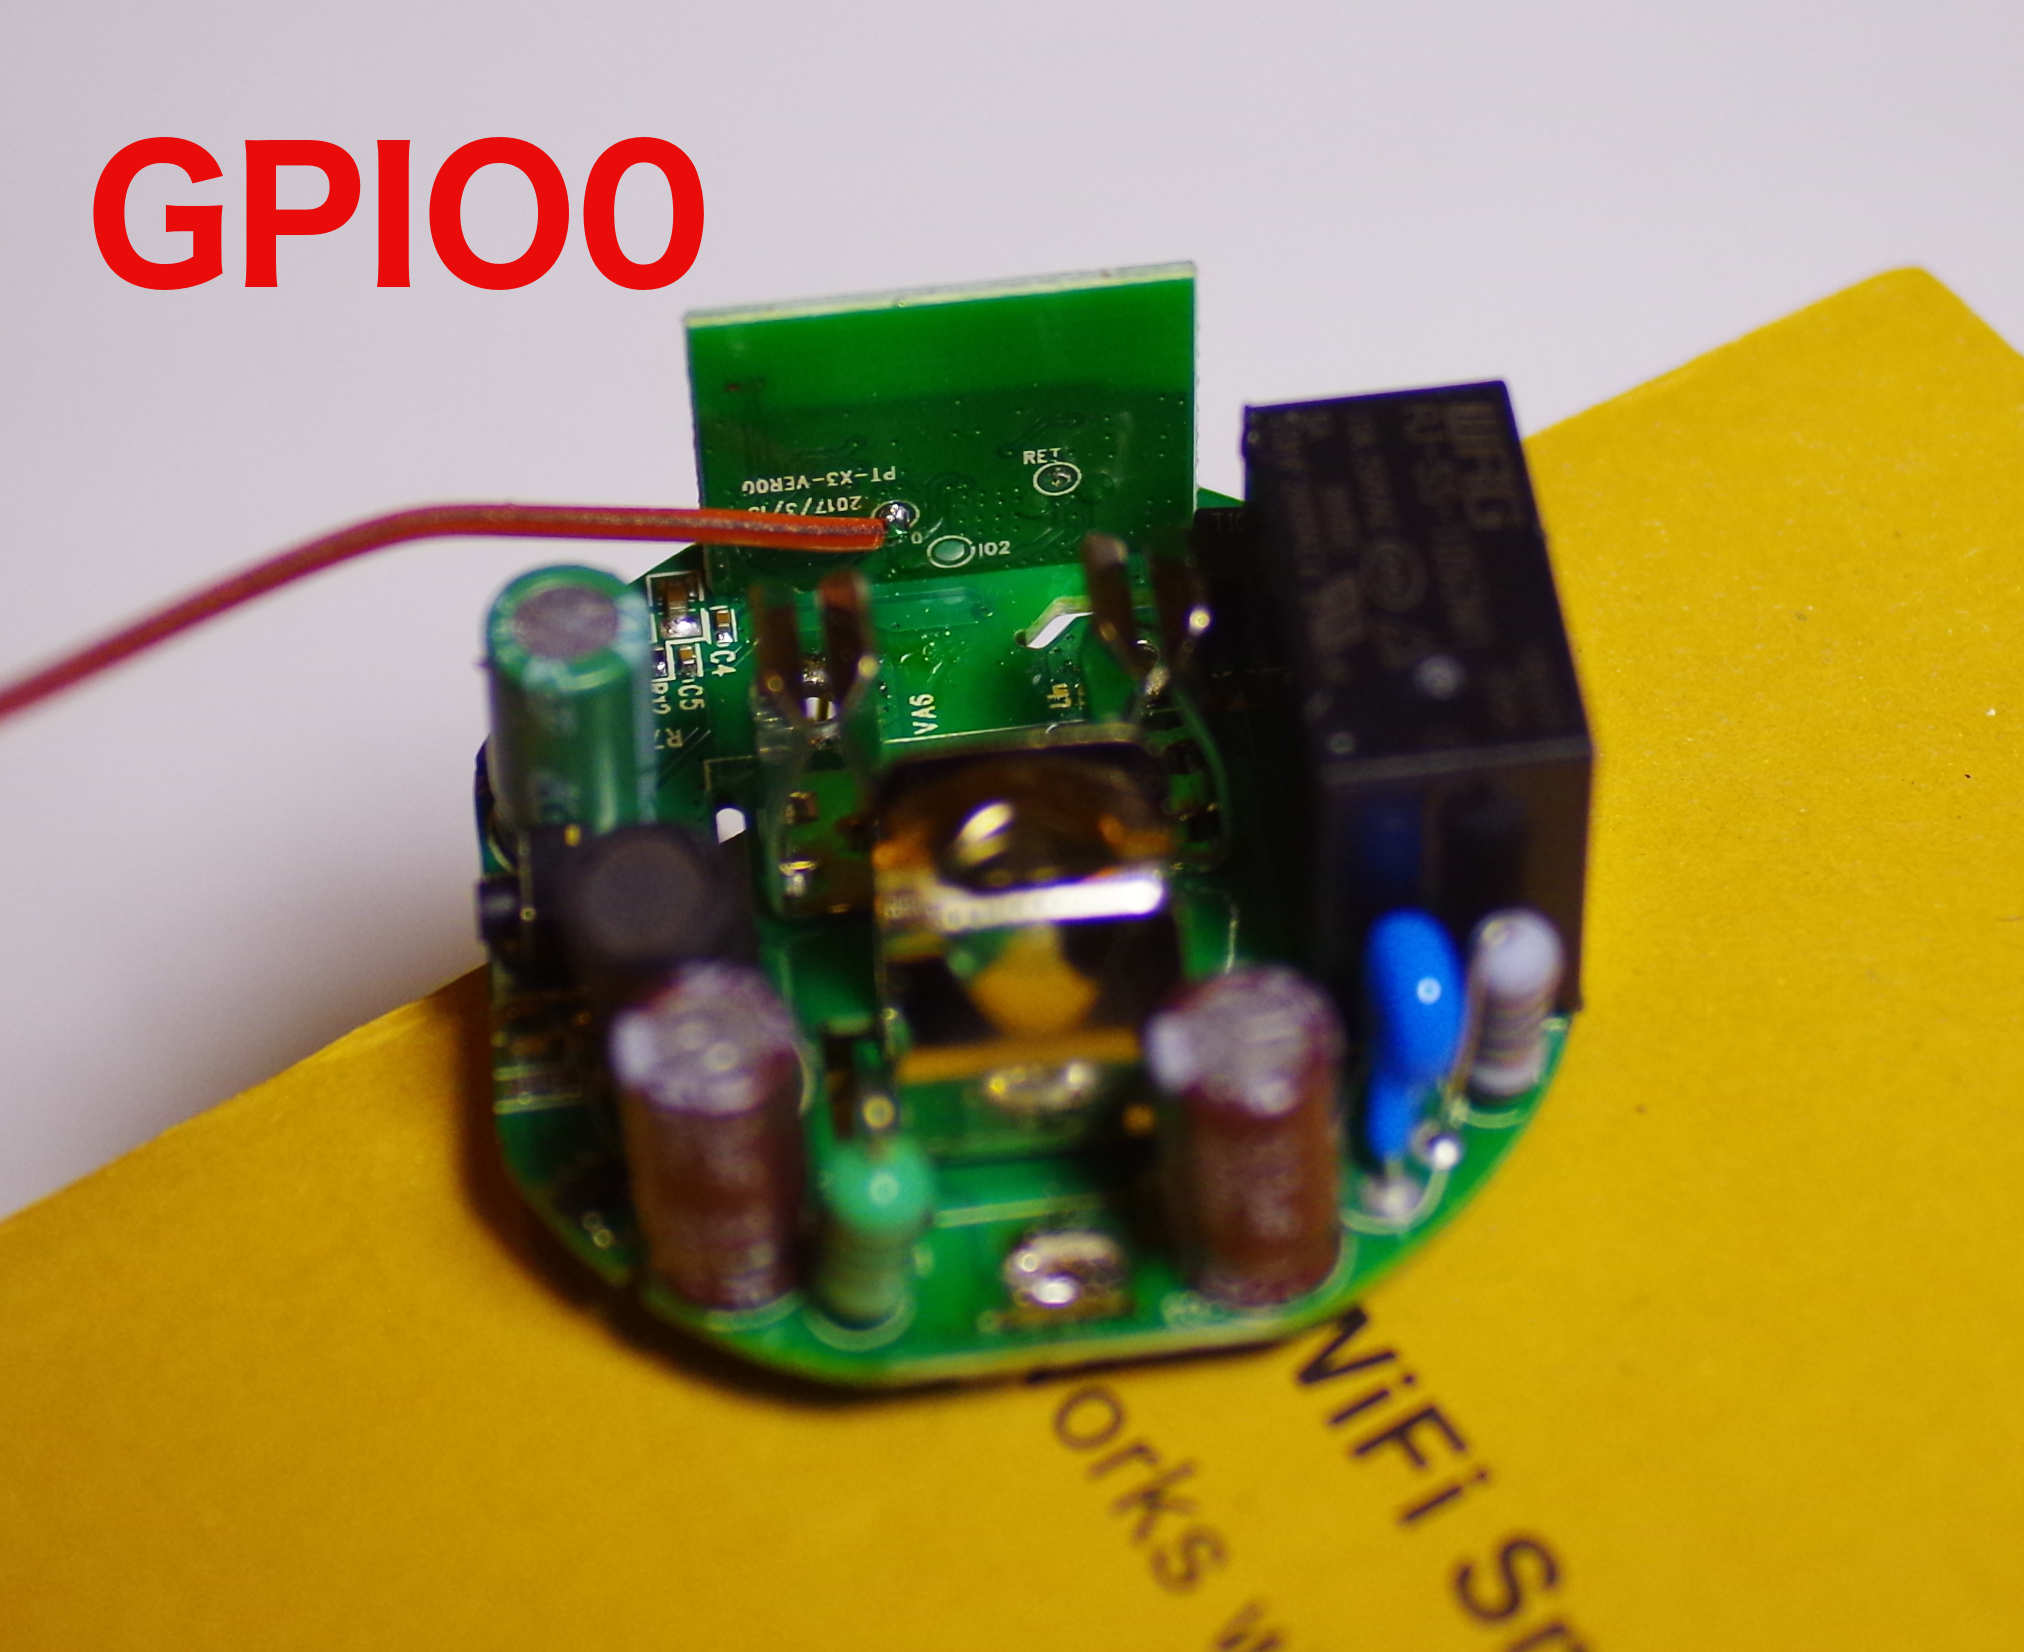
1 - Connect GPIO0 to ground and plug the usb adapter, after a couple seconds disconnect the GPIO0 from the ground. The esp8266 is now in flashing mode.
2 - Flash
3 - Restart the microcontroller and check that is connecting to the wifi.
4 - Solder everything back together and test it before putting the cap on (very carefully because THE ELECTRICITY WANTS TO KILL YOU)
5 - Put the cap back on, some super glue will do the trick.